The inverter workflow supports both Auto Recommendation and Custom Design modes. You can switch between the two modes at any time and modify the configuration after it has been applied.
Access the Inverter Tool
Go to the Stringing step from the left toolbar.
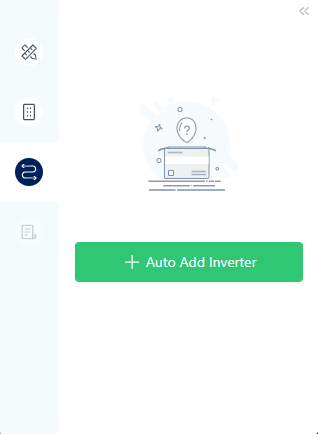
First-Time Configuration
Click Auto Add Inverter in the center of the workspace.
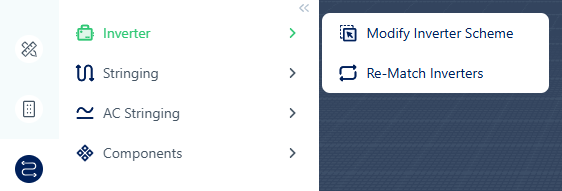
Modify an Existing Configuration
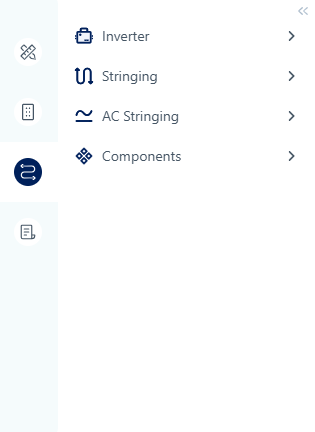
If inverters have already been configured, use the Inverter tool group:
- Modify Design Scheme – Replace the current inverter design while keeping the module layout unchanged.
- Rematch Inverters – Clear the current inverter configuration and restart the workflow.
The Add Inverter button is unavailable until PV modules have been placed.
Configure Inverters
The setup process consists of four steps.
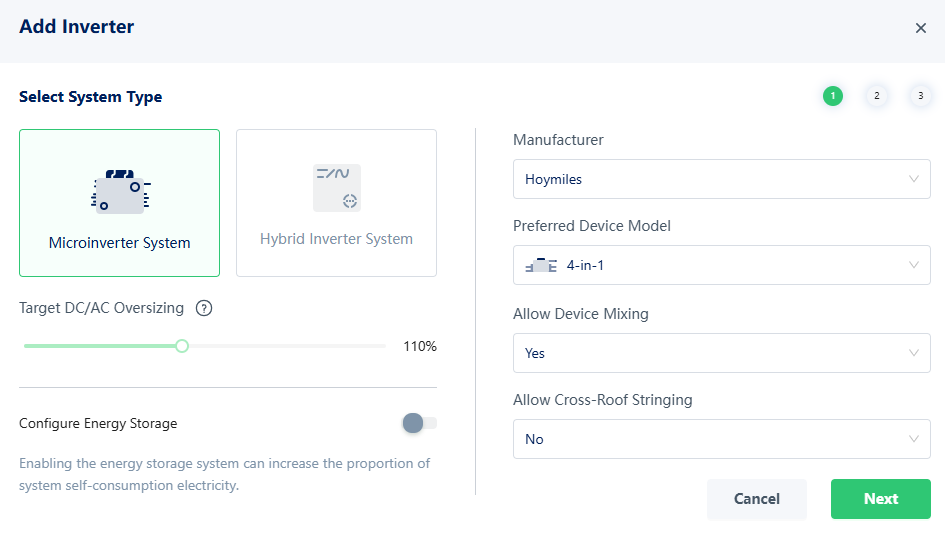
Step 1 – Basic Settings
Configure the system type, target DC/AC ratio, inverter brand, storage options, and stringing preferences.
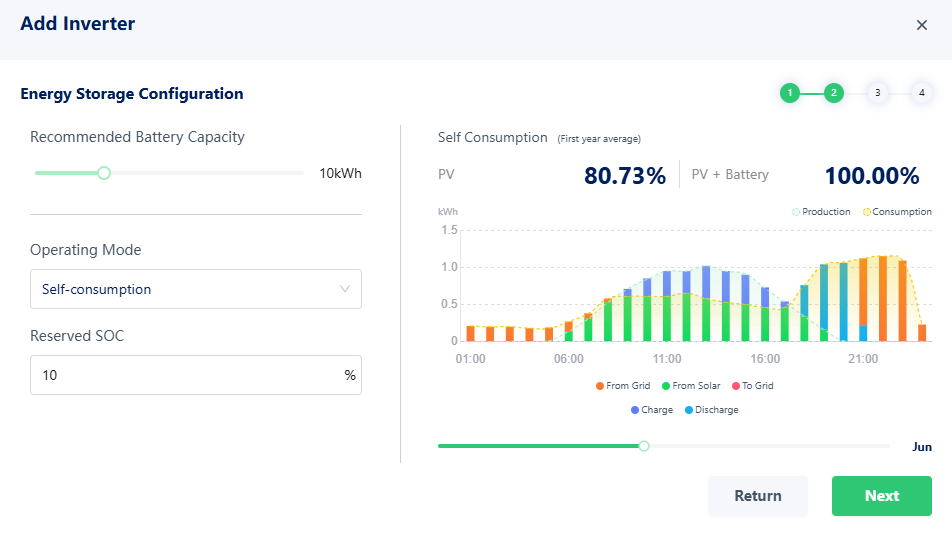
Step 2 – Energy Storage (Optional)
If storage is enabled, configure the battery capacity and related parameters.
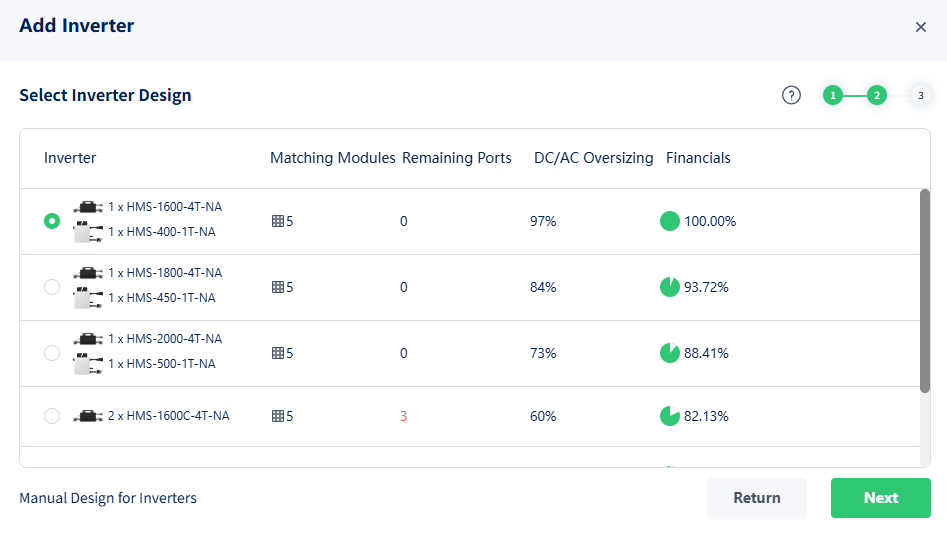
Step 3 – Select a Design Scheme
Switch between Auto Recommendation and Custom Design using the link in the lower-left corner.
Auto Recommendation
The system generates multiple inverter schemes and displays key information such as inverter combinations, total power, DC/AC ratio, and economic performance.
Select a recommended scheme to continue.
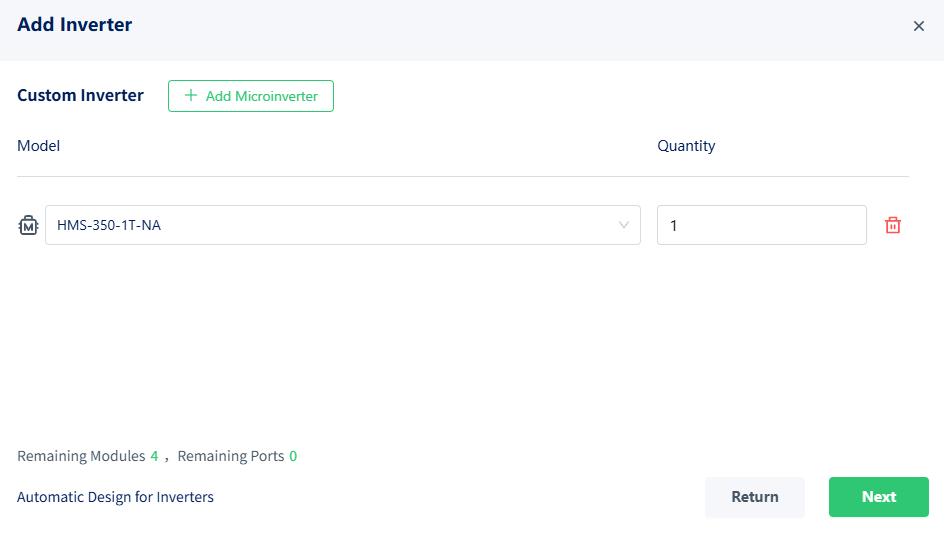
Custom Design
Manually configure inverter models, quantities, and module assignments. Remaining module counts are updated automatically.
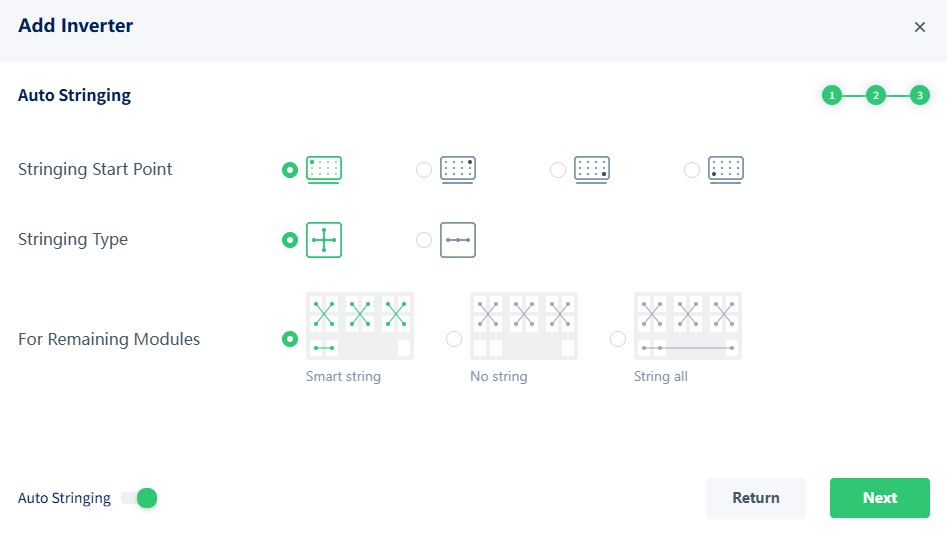
Step 4 – String Configuration
Enable Auto Stringing to generate strings automatically, or disable it for manual configuration.
Click Next to apply the design.
The system automatically places inverters, creates string connections, and updates the wiring layout.
Modify the Design Later
After inverters have been placed, use the Inverter tool group to:
- Modify Design Scheme and apply a new inverter design while keeping the existing module layout.
- Rematch Inverters to remove the current configuration and restart the workflow.