
In addition to drawing roofs manually with the Pen Tool, S-Miles Designer provides a collection of predefined building templates that can be used to create 3D roofs quickly. This method is ideal for standard roof types and can significantly reduce modelling time.
Select a Building Template
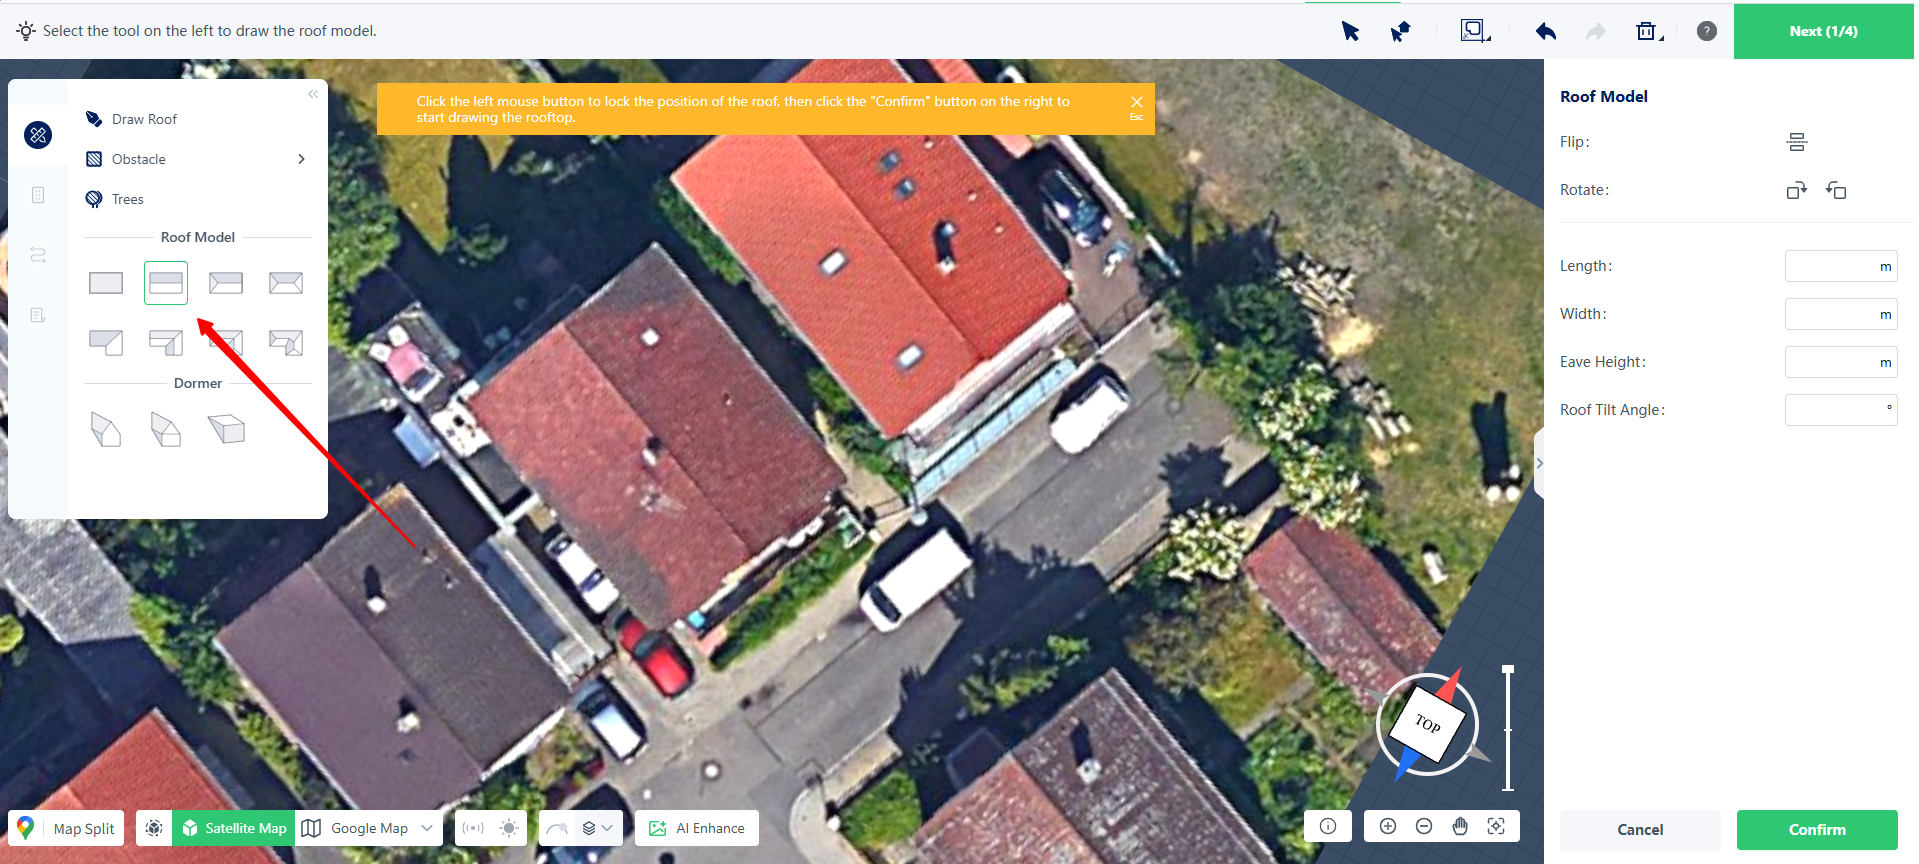
Open the roof drawing tools from the left-side toolbar and choose a suitable template from the available roof models, such as gable roofs or shed roofs.
Once selected, the software will enter template editing mode.
Place the Roof Model
Click and drag the selected template onto the target building shown on the satellite map.
This creates the initial roof model and positions it on the project site.
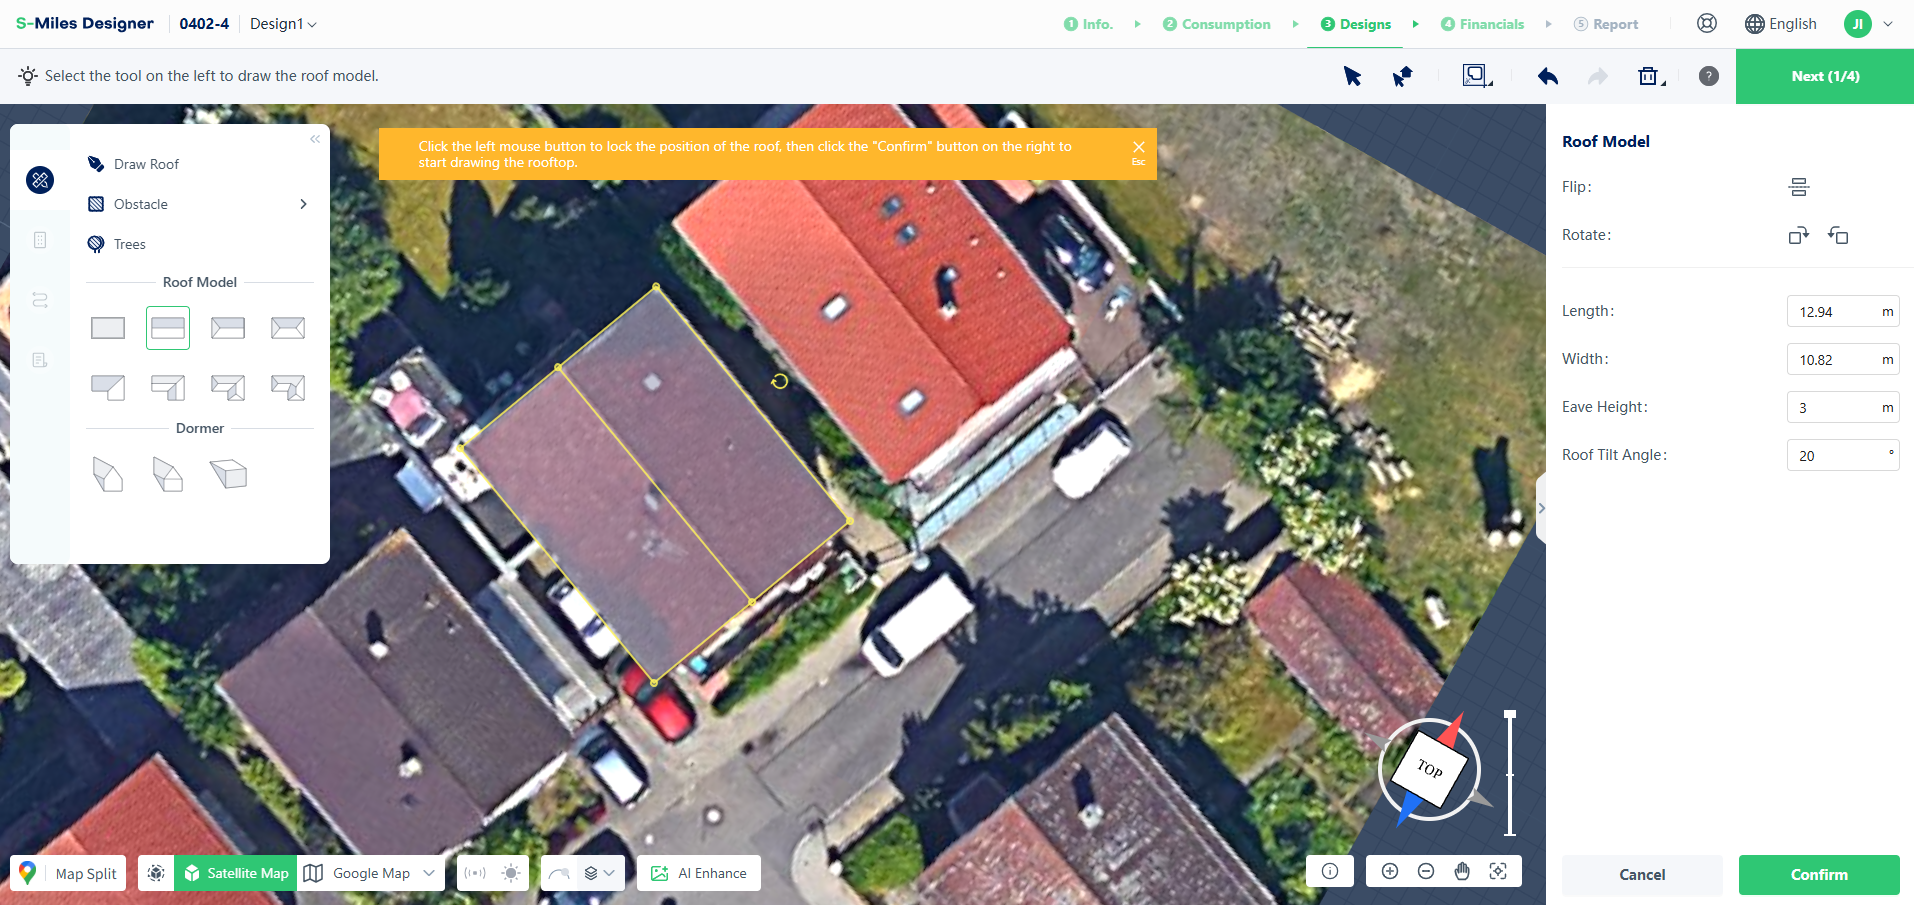
Adjust the Roof Geometry
After placing the model, you can refine its shape and position to match the actual building.
Resize the Roof
Drag the yellow control points around the model to adjust its length and width.
Adjust the Orientation
Use the rotation handle to align the roof model with the building direction shown on the satellite imagery.
Edit Roof Parameters
For more precise adjustments, enter values directly in the right-side properties panel, including:
- Roof Length
- Roof Width
- Eave Height
- Roof Pitch
Add Roof Attachments
Additional roof elements, such as dormers, can be added using the templates available in the left toolbar.
Place and adjust these elements using the same drag-and-drop workflow as the main roof model.
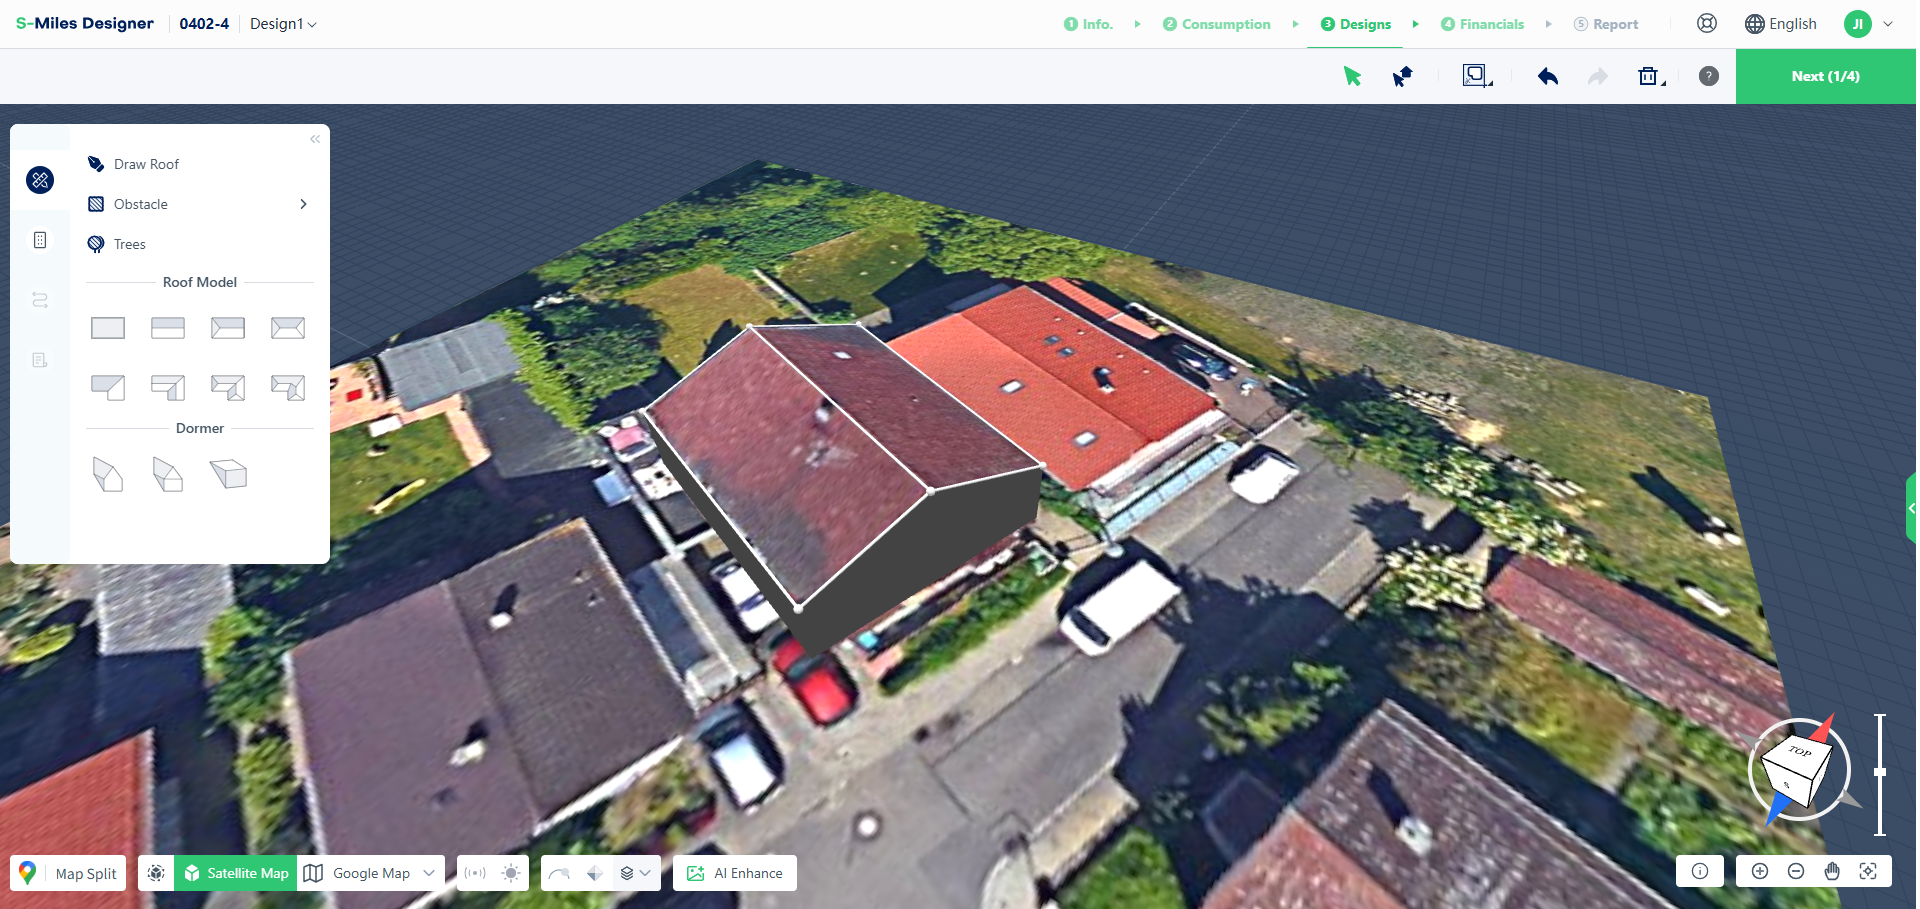
Generate the 3D Roof
After completing the positioning and parameter adjustments, click the confirmation button in the lower-right corner.
The software will generate the final 3D roof model automatically.
Complete the Model
Template-based roof creation follows a simple workflow:
Select Template → Position the Roof → Adjust Geometry → Configure Parameters → Generate Model
Compared with manual roof drawing, building templates provide a faster way to create standard roof structures while still allowing detailed adjustments when needed.